Category: Team building

Team building icebreakers. Teambuilding games and activities can be valuable for all corporate training, teams that work together, camps, youth groups, churches, and other situations where good teamwork and improved communication are essential. They’re often challenging — in a good way!

  • Sequence

    This is a team-building game of communication and pictures. Every member of the group will need to describe the picture they are given, and then as a group they must put the pictures in the correct order.

    The pictures for this game could come from children’s books, or comic books, and you can pick the source to fit the group. For groups of teenagers and young adults, a game involving a Batman or Spider Man story is bound to get an enthusiastic response. Children’s books, like The Tiger Who Came to Tea or Where The Wild Things Are, work well for nostalgic adults, and those who have children of their own.

    In everyday life we rarely describe pictures — we just show them! This game will warm up thinking muscles as well as talking muscles, which makes it an ideal start to a day of team-building activities, or as an a icebreaker to introduce new work colleagues.

    Set Up:

    • As the game organizer, who will not be playing, find a children’s book or comic book with at least as many pages as the number of players.
    • Make copies of each page.
    • Identify each of the pages with a unique number or letter, but not in their original order. If you had ten pages, you could first shuffle the pages, and then go through them numbering them 1 to 10.

    Rules:

    • Players are not allowed to read the text on the pages. They must describe what is happening in their own words. The same rule applies to speech/speech bubbles on the page. They cannot read this speech directly, but can only vaguely describe what is being said.
    • Players cannot show their page to any other player until the very end of the game, when the order has been decided.
    • When deciding on an order, pages should be placed facedown on the table.
    • The goal of the game is to have all the pages placed facedown in the correct order.

    Play:

    1. Randomly hand out the pages to all the players, so that everyone has at least one page. If there are more pages than people they should be distributed as evenly as possible.  The goal of the game is to have all the pages placed facedown in the correct order.
    2. When an order has been agreed upon by all players, the players turn all pages face-up and check that the story is in the right order. If there is any doubt, they can check with the organizer.

    Some books will be harder than others. Children’s book with a simple story and only a few images per page will be easier than a comic book with a page full of images and text, and a more complex story that might jump from scene to scene. The harder books will really get people talking, describing, discussing, and debating, and it will be a more rewarding when if the succeed, and more

    If you have a lot of players, you can turn this into a competitive team game by making two copies of the story pages, splitting the group into two teams, and timing them

    Nightmare variant:

    Players cannot describe their images in words, but must re-enact the scene on their page in mime.

    Okay, I don’t think anyone has ever really tried this, but does sound funny!


  • Tall Tales “Suddenly” Story

    Spin fantastic yarns — amazing stories — with this engaging group activity. Each person will tell three sentences of a story and end with the word “suddenly…” The next person will then have to pick up the story and add three sentences of their own.

    Tall Tales encourages the players to think on their feet and connect to the story that has already been told, which trying to stump the next person to speak. Everyone gets a turn to talk in this icebreaker, so quiet group members have an equal chance to participate. Tall Tales doesn’t require any movement and is therefore able to fit in a room of any size.

    Tall Tales is an icebreaker for groups ages 10 and up. Children younger than 10 may not have the storytelling ability to play and enjoy this game. This icebreaker can be adapted for groups of any size, although it’s not recommended to play with over 25 people. For smaller group, the story can continue around the room until you are satisfied with the icebreaker or the group gets stuck.

    Materials

    To play Tall Tales, you will need:

      • Nothing!

    Optional- You may want to have a couple of story starters on hand in case the group gets stuck and needs to start again. See Tips and Notes for story starter ideas.

    How To Play Tall Tales

    1. Explain the rules to the game. Subject material should remain appropriate to the group level.
    2. Designate a person to start the game or read one of the story starters provided below. End with the word “suddenly…”
    3. The next person picks up the story and tells three more sentences, taking the story in any direction they’d like. After three sentences, they end with the word, “suddenly…”
    4. The game continues until one of the following happens:
    • Every player gets a turn and the game has filled the time allotted.
    • Every player gets several turns and the game has filled the time allotted.
    • The players gets stuck, in which case you can either pass to the next person or start a new story.

    Tips and Notes

    Encourage players to make their stories twist and turn. Challenge each player to try to stump the person next to them.

    If players have difficulty coming up with three sentences, give each sentence an objective to help get their creativity flowing. The first sentence should introduce the new scenario (the thing that suddenly happened). The second sentence should add to the story with narration, description, or backstory. The third sentence should begin to move the story in another direction, ending with suddenly…

    Here are two sample story starters.

    Jane liked to help her parents on the family’s farm, and caring for the chickens was her favorite chore. Every morning she would feed the chickens and collect fresh eggs as soon as she got out of bed and before she had eaten breakfast. But this morning, she heard a strange noise before she entered the chicken coop. Suddenly…

    Jake had never had a pen pal before, so when the strange letter addressed to “My Friend” came in the mail, he wasn’t sure what to make of it. He opened the letter carefully, noting there was no return address. He read the first line of the letter, “Dear Jake.” Suddenly…

  • What I Would Have Done

    “What I Would Have Done” is get-to-know-you game all about what-if scenarios.  This game focuses on exploring different paths in life and hypotheticals. For example: what is another career path would you try? All you have to do is pick some words out that go along with life events. Be sure to keep the game fun and upbeat by using positive words!

    Materials Needed

    What you need to play “What I Would Have Done”:

    • Paper
    • A pen
    • A box

    How To Set Up The Game

    To set up the game just write different life events on torn-up scraps of paper. Use things like prom or sports that all the players can relate to and throw them into a box. Make sure to fold the paper or cut a hole so no one can choose their drawing and set the box in the center of the game room.

    How To Play “What I Would Have Done”

    Each player walks up and draws their own piece of paper. They then read the paper out loud, state what originally happened in their life with the word, and then say something they would like to try instead. For example, they draw sports. They should state that they originally played soccer, but if they could try another they would play baseball. Afterward, they say why they would choose to try the new activity.

    Make sure no one steals the show for too long!

    How To Win

    This is a game with no winners or losers; the point is to open up discussion paths amongst the group. Be sure to listen to the other players and give a genuine answer when it’s your turn to truly break the ice.

  • Art Effects

    The point of Art Effects is to build your group’s teamwork up with creativity and cooperation.  In this game, your group will give keywords to convey items to their partner to create an art masterpiece. This game is great for groups of all sizes and requires a little bit of setting up according to the size of the group. Be sure to have a critic overlooking your artists to make sure everyone is playing fairly throughout the game. There is both a competitive and non-competitive version of the game, so be sure to pick how you want to play!

    Materials Needed

    Materials needed to play Art Effects:

    • Paper
    • A surface to draw on
    • Pencils
    • Erasers

    How To Set Up The Game

    To set up the game start by getting a headcount of who all will be playing try to get an even number of people for teams and have an extra to be the critic. Write down random words that can be described — like goose or pizza — on slips of paper and hand them out as everyone comes in the door. Be sure to be stocked with a pencil sharpener and enough supplies for all the drawers.

    How To Play Art Effects

    Non-competitive:

    Pick out or have drawers volunteer from the group and then randomly select a partner for them to pair with. Each partner should have a few items to describe to their drawer. Once the partners are decided have everyone take a spot away from each other with the drawer and describer sitting back to back. Each pair will attempt to draw one item without the item being named, only described. Set a time limit or a word limit to keep the game interesting.

    If desired you can switch descriptors and drawers out in a rotation, so everyone will get a chance to work together during the game.

    Competitive:

    Set up the exact same way you would in a non-competitive game, but have a stricter time limit or word amount. Give each player in charge of descriptions at least five slips of paper. The drawer will then have to figure out each item and put them together in a creative light on paper. Whichever team has a more accurate drawing of the word chosen by the describer is the winner.

    *NOTE: The drawer can not ask questions in either version.


    How To Win

    If you choose to go the competitive route keep an open mind while your partner describes the item to you. If you have no pre-set ideas you are more likely to catch on to what they are trying to tell you.  When it comes to placing it all together take it easy and just go with the first things that come to your mind.

    If you are the describer use words that you would use to describe the item to a parent. The more clear descriptors for the item, the better the chance of the drawer catching on to your word. If you don’t know what the item is then ask to switch or quickly Google the item on your phone to get a grasp on its appearance.


  • Collaborative Drawing

    Combine your artistic talents together to create the ultimate drawing without seeing what others have added before you!

    This icebreaker game is good for ages 10 and over. Collaborative Drawing must be played with a minimum of 4 people.  There is no maximum amount preferred.  If groups get unmanageable, subdivide into smaller sized groups.

    To play this game you are going to need the following items:

    1. Paper for all participants
    2. Writing utensils for everyone
    3. A timer or stopwatch

    Setup for Collaborative Drawing

    You won’t need to set anything up prior to starting this game!

    How to play Collaborative Drawing

    1. Distribute paper and writing utensils to everyone that will be playing. Make sure that the players are sitting in some sort of orderly fashion such as a circle or in straight lines.
    2. Instruct each person to fold their paper into four equal sections, as you would fold a letter. They should then unfold the paper so that it is flat again.
    3. Players are then told to draw a head for their drawing in the uppermost section. It doesn’t matter what kind of head they draw or where on the upper section it is, as long as the neck connects to the top of the second section on the paper.
    4. Instruct players to fold their paper over in order to hide the head they drew, leaving only the very bottom of the neck showing to help the next player in their drawing.
    5. All players pass their folded papers to their left and accept the paper being handed from their right side. Each time a new paper is given to each player, they must draw the missing section, connecting it to the other person’s previous section without actually looking to see what it looks like. This process will be repeated for all three of the other remaining sections: torso, legs, and feet. Make sure that all the players know to leave the very bottom of their drawing visible so that the next person can continue on. Each section should be timed to avoid spending too long on this game.
    6. Once the drawings are all completed, open up the papers and check out the crazy creatures or people that are featured there!

    Winning the game:

    This game should be used as a fun icebreaker. There is no way to win or lose the game. Its purpose is just for people to get together and have some funny drawing crazy creatures!

  • Best Skills Showdown Game

    Compete against other teams in a series of mini-games to see who has the ultimate collection of talent and weird skills!

    This activity works best as a large or extra large group activity (15+ people), ages 8 and up.

    Materials required:

    We recommend that you bring any props desired for activities. For example:

    • Bandanas (or other blindfolding material)
    • Plastic cones (to mark boundaries in activities)
    • Balloons
    • Foam balls
    • Measuring tape

    How to set up the game:

    If any props require setup before they can be used, prepare them ahead of time. Prepare a list of mini-games for the game.  Otherwise, this game requires no setup.

    How to play:

    1. Separate the large group into smaller teams of 4-6 people, depending on how large the group is.
    2. Announce the first activity that each team must participate in. After you have said what the activity is, ask for one member of each team to come and compete against the others. For example, if the first round is for “the highest jump” than you would tell each team what the game is and ask them to choose the member that they want to compete for this title.  Other activities can include: most push-ups, who has the longest middle name, who can throw an object the farthest, best dancer, most sit-ups, etc.  Be creative and come up with a nice variety of quick games!
    3. When one member from each team comes forward to compete, you can proceed with the game that round until the winner is found. For “the highest jump” you would have each player jump three times and judge who jumped the highest of all the players.
    4. Proceed to the next activity round with a new set of players from each team. Ask for new volunteers and compete as usual until all the activities you had planned are finished.

    Inclusion tip: Do not let the same person compete in 2 rounds back-to-back. Instead, make it a rule that they can only compete in every other round at most. Each person in the team must compete in at least 1 round for the team to be able to win the game.

    Winning the game:

    Each time a player wins an activity round they will get one point for their team for winning that title (Example: highest jump). At the end of the game the team with the most titles is the winning team. You can have the team perform all their title actions at the end as a fun way to conclude the game. No team is able to win the game unless every single member on the team competed in at least 1 activity round.

  • Identity Circles

    Identity Circles

    Identity Circles / Value Circles

    Identity Circles (also known as Identity Cards or Value Circles) is a deeper get-to-know-you game, during which you will have an opportunity to discuss with many friends the values that make up your identity and how you prioritize them in your life. For this activity, you will be paired up with several different people, the number depending on how many people are in your group.

    The activity works best in even numbers, as pairing requires. To begin, divide your group in half and create two concentric circles (one inner circle and one outer circle). The people in the outer circle should face inside, and the people in the inner circle should face outside. Each inner circle person will pair up with an outer circle person. You can stand, sit on the floor, or use chairs for this activity; whatever is most convenient.  This game works best indoors.

    Setup for Identity Circles/Value Circles

    Purchase several index cards, enough for each participant to have ten index cards (for example, if you have sixteen players, you need at least 160 cards). Also purchase pens so that each participant has one to use.

    Instructions for How to Play

    Hand out the index cards and pens to each participant. Ask the participants to think about their values and what makes up their identity. Instruct them to write one value on each index card. They should have written down 10 values in total. Some examples of categories that can be useful for identifying values:

    • Race (e.g. Hispanic, Asian, Black, Caucasian, etc.)
    • Religion (e.g. Muslim, Christian, Athiest, etc.)
    • Occupation (e.g. Engineer, Artist, Student, Teacher, Doctor, unemployed, etc.)
    • Family (e.g. sister, brother, mother, father, daughter, son, etc.)
    • Traits (e.g. athletic, musical, artistic, analytical, creative, funny, etc.)
    • Activities (e.g. sports, cooking, comic books, making movies, etc.)
    • Health (e.g. healthy, immobile, mobile, depressed, diabetic, etc.)
    • Socio-economic (e.g. wealthy, middle-class, financially struggling, etc.)

    Once everyone has their values written down, have the participants share with their first partner why they chose to write down the values they did. After sharing for 5-7 minutes, ask all participants to rip up one of their cards. This part of the activity gives participants an opportunity to reflect on how they prioritize their values. Ripping up the card should help the participant imagine living without that part of their identity.   After the participants rip up one card, the outer circle will rotate one partner to the right. Everyone should have a new partner now. Have the new pairs discuss why they ripped up the card they ripped up.

    Continue this process until all participants are each left with one card — their most important value.

    Optional instructions: Have each person create values cards and try to order them from most important to least important.  Have each person share these values with each other and explain each one, without destroying the cards.

    This is a very easy, low-maintenance group activity that requires little preparation and can work for as small as 8 people to as large as 50 people. This activity is also good to help encourage people to share deeply with others with whom they would not otherwise share.

  • Group Juggling

    Group Juggling

    Group Juggling is a great, high-energy active icebreaker activity that helps participants learn the names of the other people in the group.  It works best when it is played in groups of about 15-20 people.  If you have more than this number of players, you can divide into smaller groups.  This game can also serve as a teambuilding activity if people do not know each other well.

    Setup for the Group Juggling Activity 

    This game is best played outside in a grassy area, or in a large, open space indoors. You will need several soft balls/tennis balls or other soft fun objects, like rubber chickens and stuffed animals. Dog toys (preferably unused) make great choices too, as they usually come with great sound effects. Bowling balls are not recommended.

    Playing the Group Juggling Activity

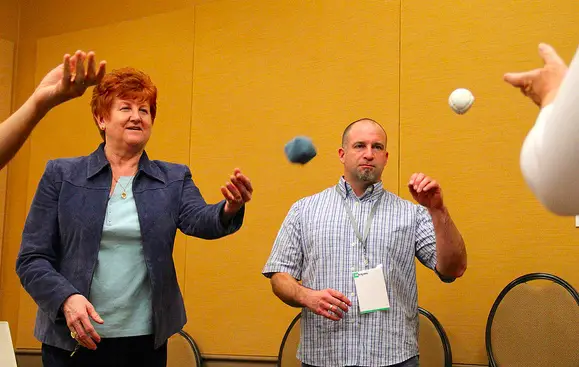
    Ask the group to form a large circle, with everyone facing the center. Start by tossing the ball across the circle to another person. As you toss, say the name of the person you to whom you are tossing. This lets them know the ball is coming to them and lets everyone hear their name. Once that person catches (or retrieves) the ball, they pick someone else, shout their name and toss them the ball. Play continues with the one ball until it makes it to everyone in the group. Once someone has received the ball, they cannot get it again. Last person in the group throws it back to the group leader. Practice the pattern a few times, always tossing to and receiving from the same person in the group. Once your group has the pattern down, start adding additional balls/objects, this is where the mayhem really begins. Keep going, try to get at least five objects going at once. Feel free to try again with a new pattern and mix it up.

    This game takes about 10 minutes in a group of 20-30 people. If you have more than 30 players, consider dividing into two circles to keep the throws within easy catch and toss range.

    If having too many objects makes the game too chaotic for your group, you may also reduce down to one ball.

  • Ships and Sailors Game

    The Ships and Sailors game is a fun way to get a group of people working together and creating bonds. It’s ideal for medium to very large groups, and because it’s an elimination game, the amount of players in each round will shrink. The game is named Ships and Sailors because players follow instructions related to the theme of being aboard a boat or in the ocean. Since there are many different commands, it’s a good idea to practice all of the moves a couple of times through before officially starting the game. This game is best played in large open spaces such as a field or basketball court, so that players can move safely about the boundaries.

    Set-Up

    • Select one person to be the “captain.” They will be in charge of calling commands throughout the game.
    • Mark the boundaries of the area as you would a boat. For example, on a basketball court Starboard would be near one basket, while Port is located on the opposite side. The sides are either lines running perpendicular to Starboard and Port.

    Practice the commands:

    • Port-North—run in the direction of the marked Port
    • Starboard-South—run in the direction of the marked Starboard
    • Seasick—run to the sides of the boat and pretend to get sick
    • Man Overboard—(2 players) one person is on their hands and knees, while the other puts their knee/foot on that players back and pretends to look overboard.
    • Shark—(1 player) lie on your stomach with an arm up to look like a shark fin.
    • Fish out of water—(1 player) lie on your back kicking your knees like a fish out of water.
    • Jellyfish friends—(2 players) partners face each other and wiggle their arms.
    • Row, row, row your boat—(3 players) 3 players sit in a line and pretend to row a boat, while singing “row, row, row your boat gently down the stream. Merrily, merrily, merrily life is what a dream.”
    • Dinnertime—(4 players) 4 players sit as if they were at a table and pretend to eat.
    • Captain on Deck—Freeze where you are, face the captain, and hold the salute position. You can’t break this position until the Captain says, “At ease.” If you follow any other command before hearing “at ease,” then you will be kicked out of the game.
    • At Ease—The only command to release players from “Captain on Deck” position.

    How to Play the Ships and Sailors Game

    • Select a captain who will call out the commands during the game.
    • Review the commands listed above.
    • At any point in the game, if someone if the last to perform the command or does the wrong command, then they will be out on the sidelines.
    • Those players who are out can help the captain spot other players to eliminate.
    • The captain will call out the commands for the players to follow.
    • Players will need to listen and react to the commands accordingly. If the command involves a partner, 3 players, or 4 players, then groups will need to form quickly to avoid being eliminated.
    • There are no set partners or groups.
    • At least one person will be eliminated in each round—sometimes more depending on the command.
    • The game is played until the last player is standing.

    Variations

    • This game can be played with smaller groups if needed.
    • The commands can be adjusted to follow a different theme or response.
    • If physical activity needs to be limited then adjust moves like shark or fish out of water to avoid lying on the ground.
    • The captain can call out commands as quickly or slowly as he or she wants. Command times can be adjusted to increase the competitiveness.

    Like this activity? Please check out our other great 100+ icebreakers!

  • 6 Challenging Party Games With Paper Cups

    1. Yank Me

    A game of steady-handed stacking and precision demolishing of paper-cup towers. Can be played solo, as a race, or in teams.

    You will need:

    • Three medium sized index cards per player. They need to be big enough to fit a paper cup on top of. If you can’t find index cards, try and find A4 paper of a similar weight that you can cut up into thirds across the width. You want fairly thick paper, at least 150gsm, or it won’t hold the cup.
    • Four paper cups per player

    Rules

    The challenge for each player is this:

    1. build a tower of upside-down cups that is four cups high, with an index card between each cup.
    2. from top card to the bottom, remove the index cards so that the cups fall onto each other in a stack.

    If you stacked the cups poorly, or you don’t pull the cards in the right way, the cups will tumble off the tower and you will have to stack them back up to their full height before you can try again.

    The first player to build and collapse their tower is the winner!

    To play this as a team race, get into teams of two and assign one person as the builder (who builds the tower) and another as the collapser (who removes the index cards). If the collapser causes cups to fall away from the tower, the builder must take over again to restack the tower to it’s full height before the collapser can try again. The first team to finish wins!


    2. Moving On Up

    A game that asks player to try to be a little ambidextrous, as they alternate hands to hastily cycle through a tall stack of cups.

    You will need:

    • Lots of plastic cups! 40 per player, in fact.
    • One cup of each 40 should be a different colour to the others. If you don’t have multiple colours of cup, you could simply colour one of the cups with marker pen.

    (To save on plastic cups, instead of having everyone play simultaneously, you could use only one stack of 40 cups and time each player when it is their turn.)

    Set Up

    For each player, stack all 40 cups with the differently colored odd-cup on the bottom. Give one stack to each player to hold at the bottom with one hand.

    Rules

    Players will take the cup from the top of the stack and move it to the bottom of the stack. With their other hand, they will now reach again to the top of the stack and move that cup to the bottom. This continues, with players alternating hands with each cup moved, and the odd-cup slowly moving up the stack.

    The winner is the first player to get the odd-cup to the top of the stack and move it back to the bottom, completing the cycle.


    3. Flip Your Lid / Cup Ballet

    Here’s a challenge with a plastic cup and a bottle that is very satisfying to pull off.

    You will need:

    • One bottle (glass or plastic) per player.
    • One plastic cup per player.

    Set up

    1. Place the bottles about 30cm away from the edge of the table.
    2. Turn the plastic cup upside down and place it over the edge of the table, so about one third of the opening hangs over the edge. Each player should have a plastic cup set up in this way facing their bottle.

    Rules

    Use your fingers to flip the plastic cup into the air towards the bottle. The first player to get their cup on top of the bottle (upside down) wins!

    You can also play in teams. Have one player hold the bottle. They will stand on the opposite side of the table. The player flipping the plastic cup will now have further to flip it, but their teammate will actively move the bottle to try to “catch” the cup. The first team to do so, wins!


    4. Pass The Water

    A relay race of passing water from cup to cup. The twist? You pass the water over your head, without looking. If your teammates get overexcited this could be a wet game.

    You will need:

    • A plastic cup for each player.
    • Water.

    Set-up

    1. Split your group in half. Arrange them into two lines, all players facing the same direction, one behind another.
    2. Give each player a cup.
    3. For the player at the front of the line, give them a cup that is filled to the brim with water.

    Rules

    Without turning, the players at the front of the lines must raise their cup over their head, then pour the water in the cup backwards, while the player behind them will (hopefully) catch as much of the water as they can.

    Repeat until the water has reached the last player in the line. The team with the most water left in the last player’s cup wins!


    5. This Blows

    Commit the air from your lungs to a balloon then skillfully wield it, like Storm from the X-Men, to topple paper cups. Or waste it as your balloon pathetically deflates.

    What you need:

    • A balloon per player.
    • 15 cups per player.

    Set-up

    1. Place the plastic cups in a line at about 15cm from the edge of the table. Each player should have their own separate line of 15 cups.
    2. Take hold of your balloon and prepare yourself.

    Rules

    Inflate the balloon, then hold the opening closed with your finger. Face the opening towards the first cup in the line on the table. Release the air from the balloon so that it pushes the cup, until the cup falls off the table. Repeat with the next cup in the line. You should be able to get several cups off the table before you have to reinflate the balloon.

    The first player to blow all 15  cups off of the table wins.

    6. Cup Stacking

    This game, that seems the simplest in the list, is in some ways the most competitive. There are even cup stacking championships. The world record for “sport stacking” is 1.33 seconds. How fast can you do it?

    What you need:

    10 cups per player. That’s it!

    Rules

    The challenge for each player is this:

    1. Build a pyramid of cups. Start with a line of four to make the base. On top of these, above the gap between the cups, place another three cups, each resting on two cups below. Repeat this with a line of two cups on top of that, and a final cup at the top.
    2. Collapse the pyramid into a single stack of cups. Instead of doing this one cup at a time, you can take the top cup and carefully work it down one side of the pyramid, collecting one cup at each level, then take that stack back up to the new top cup continue collecting cups. You can collapse a pyramid of cups very quickly this way, but don’t go so fast that you knock the whole thing down.

    The first player to collect all their cups back into one stack wins.

    Competitive cup stacking uses more complex patterns, but the challenge above is a good place to start. If you want to learn more about cup stacking, speedstacks.com/learn/ might be a good place to start.